
Having many plants is definitely a cure-all for the spirit, but managing them can become quite burdensome, especially considering the watering needs that differ from plant to plant.
Even if you have only a few plants but constantly worry about whether you overwatered or underwatered them, a solution to this problem has finally arrived!
These vases have been on the market for years and, before offering them to you, I tested them extensively to make sure they worked perfectly.
The operating principle of these inserts is quite straightforward; their dimensions change based on the diameter of the pot cover we intend to use, ensuring the plant receives consistent, uniform, and well-controlled irrigation through the physical principle of capillarity.
They can be utilized with the substrate as well as for hydroponic cultivation.
Elho reserve pots are small pearls that truly assist us in the optimal daily care of our plants; here are the main benefits:
- It will no longer be necessary to check plant by plant if it needs water, if there is stagnation in the saucer or if there is an excess of water;
- this system guarantees uniformity in wettingthe water is taken directly from the soil by capillarity from the bottom of the pot which acts as a saucer, following the principle of sub-irrigation;
- the surface of the soil remains rather dry as the capillarity force in that area is reduced, this allows us to keep the substrate around the collar slightly humid, thus helping us to prevent collar rot;
- it is also very convenient for managing plants while you are away on holiday.
To be fair, as we are going to explore the pros of this system, we are also going to illustrate the cons, so that you can decide whether vases with water reserve are for you or not 😉
In fact, these inserts are not suitable for all plants, they should be avoided for example for succulents and succulents, they should be avoided in general for those plants that always want predominantly dry soil.
When we talked about sub-irrigation we saw the mechanism of this process, today we are going to confirm that thanks to hydration by capillarity it is possible to allocate water only in the micropores, thus not saturating all the larger spaces (macropores) that exist in the texture of the soil and which are and must be reserved for the air and oxygenation of the plant.
A small but necessary premise is that for this principle to work the soil must be of good qualityif, for example, you find yourself inserting clayey soil you would have to deal with water saturation due to the fact that that substrate has many more micropores in relation to macropores.
Furthermore, you absolutely must not put expanded clay on the bottom of the vase, as it would compromise its functionality.
The environment thanks you
In a period in which environmental protection is more necessary than ever, Elho produces its vases using recycled plastic, using the energy of a wind turbine which located in their company’s yard allows the use of renewable sources.
In addition to this, the jars with reserve allow you to limit water waste by allowing you to use the water that would normally be wasted (for example that remaining in the basin after washing the tomatoes) by inserting it into the inserts of the jar, optimizing resources.
Now that we understand why to use them (and when not to use them), the best time has come: practice! So let’s find out how to use them, but here too, let’s start from the basics.
The composition of the vase
The insert consists of two parts:
- body – contains a small grate that is used to filter the water that we put into the vase holder;
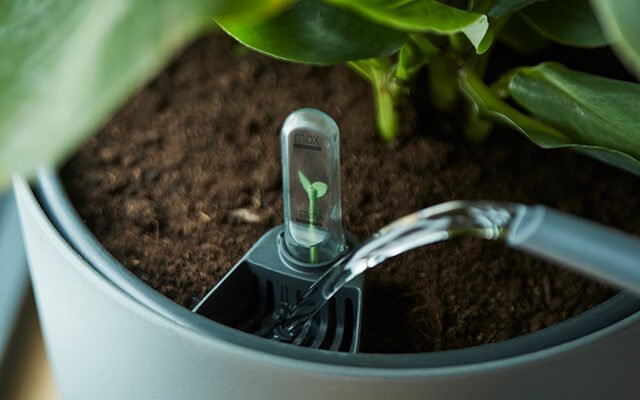
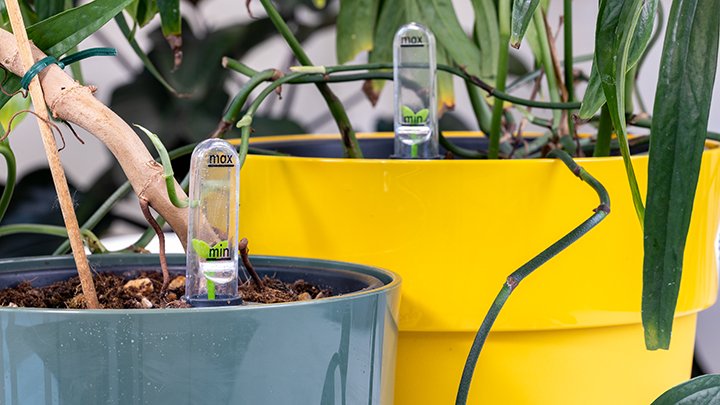
- floating – a dipstick which, thanks to an indicator, allows us to understand whether the water reserve is full or empty.
This dipstick works using a polystyrene ball which is located at the bottom of the meter, when the water rises the ball floats bringing the meter up, all calibrated according to the size of the insert we are using.
Assemble and use the jar with reserve
Once we have purchased the vase with water reserve we will find the main body and the meter that we will have to mount in order to then use our vase. Of course you will find the instruction booklet inside but the process is really simple:
- Identify the bottom of the meter (the part equipped with sockets to feel the water and inside which we find the polystyrene ball that acts as a float);
- join the thinner green rod together, holding the leaf upwards;
- insert the rod inside the bottom of the meter (so that the base rests on the polystyrene ball);
- assemble the upper part;
- on the base mount the small spacer used to fix the meter on the insert;
- once the meter is completely assembled, insert it into the appropriate compartment in the jar, it is important to also secure the spacer well;
- insert everything into the chosen vase holder;
- add water until the indicator reaches the maximum level;
- add excellent quality soil on the bottom (or as much as necessary), as always we recommend the use of One plus;
- proceed with repotting the plant;
- insert the plant into the chosen pot;
- wet the soil;
- after about a quarter of an hour check the indicator, the dry soil will almost certainly have already lowered the quantity of water present in the insert and it is therefore time to add a little more 😉
In winter the water needs of plants in the substrate change, in fact there is often a need to reduce the frequency of watering to accompany the plants during a phase of lower vegetative growth if not total rest.
Tips for best tackling the winter period with this type of plant are:
- wait to fill the water reserve after it has run out;
- keep the substrate monitored which will still have some residual humidity;
- make sure that the soil is completely dry, perhaps using a wooden stick to insert to check even the deepest parts of the substrate;
- proceed with either manual irrigation (not recommended because the benefits of capillarity wetting are lost) or fill the reserve to approximately 1/3 of its capacity, then checking that the soil is moist after absorption, otherwise you can add a little more water.
Once these 4 points have been completed, the reserve will still be empty but the soil will be hydrated, so it will be sufficient to wait until the substrate is dry again to repeat the process suitable for the winter season.
This process, however, must be done by studying the climate of your home.
What water to use?
We often ask ourselves what is the best water to use for our plants, what we can advise you is to use water from the air conditioner or, if you manage to collect it, rainwater.
How to fertilize plants in pots with water reserve
Fertilization is naturally essential to maintain healthy plants. However, I recommend avoiding the addition of fertilizers to the vase water, particularly organic ones that often have an unpleasant odor, to prevent the spread of bad smells.
The suggestion is, when possible, to carry out foliar fertilization (with a product like Asso di Fiori), perhaps adding Algatron or Sinergon to give additional energy with a biostimulant.
Otherwise, another very useful fertilizer in these cases is Flowertablets, made up of tablets that can simply be inserted into the soil, crushing them a few centimeters below the surface. Flowertabelts is a slow release fertilizer, lasting approximately 2 months, which begins to dissolve when hydrated, distributing all the minerals in the circulating solution.
Classic mineral granular fertilizers can also be used, with the only recommendation being to bury them 1-2cm below the surface to ensure that enough water reaches them for proper dissolution.
Are the inserts compatible only with Elho toilet covers?
We know you’re wondering! Well we have good news: the inserts with water reserve can be used with any type of pot holder, both plastic and ceramic, not necessarily from the Elho brand. These pots cover a good variety of sizes ranging from 17cm in diameter up to 44cm.